How to Show Cryptocurrency Live Prices on Your Website for Free
Please Subscribe to our YouTube Channel

Displaying live cryptocurrency prices on your website can engage your audience and provide valuable information. There are two primary methods to achieve this: using free APIs and web scraping. Each method has its advantages and limitations, which we will explore along with complete code examples.
Method 1: Using a Free API
Pros:
- Easy to implement
- Reliable data
- No maintenance required
Cons:
- Rate limits on free plans
- Possible downtime if the API provider has issues
- Personal use based only
Steps to Implement
- Sign Up for a Free API Key:
- Most of the Cryptocurrency data provider has a free tier API to use. You can visit CoinGecko, CoinMarketCap, CryptoCompare, Nomics, Binance, or any other website and sign up for an API key.
- Create the HTML and JavaScript Code:
- Use the following example to fetch and display live cryptocurrency prices using the CoinGecko API. This is just an example, you can use APIs from other service providers. Since CoinGecko doesn’t require you to use an API key for a free tier, this makes it easier to use.
<!DOCTYPE html>
<html lang="en">
<head>
<meta charset="UTF-8">
<meta name="viewport" content="width=device-width, initial-scale=1.0">
<title>Live Cryptocurrency Prices</title>
<style>
table {
width: 80%;
margin: 50px auto;
border-collapse: collapse;
}
table, th, td {
border: 1px solid black;
}
th, td {
padding: 10px;
text-align: left;
}
th {
background-color: #f2f2f2;
}
</style>
</head>
<body>
<h1 style="text-align: center;">Live Cryptocurrency Prices</h1>
<table id="cryptoTable">
<tr>
<th>Name</th>
<th>Price (USD)</th>
</tr>
</table>
<script src="https://code.jquery.com/jquery-3.7.1.min.js"></script>
<script>
$(document).ready(function() {
const apiUrl = 'https://api.coingecko.com/api/v3/coins/markets?vs_currency=usd&order=market_cap_desc&per_page=10&page=1&sparkline=false';
$.getJSON(apiUrl, function(data) {
const table = $('#cryptoTable');
$.each(data, function(index, coin) {
const row = $('<tr>');
row.append($('<td>').text(coin.name));
row.append($('<td>').text('$' + coin.current_price.toFixed(2)));
table.append(row);
});
});
});
</script>
</body>
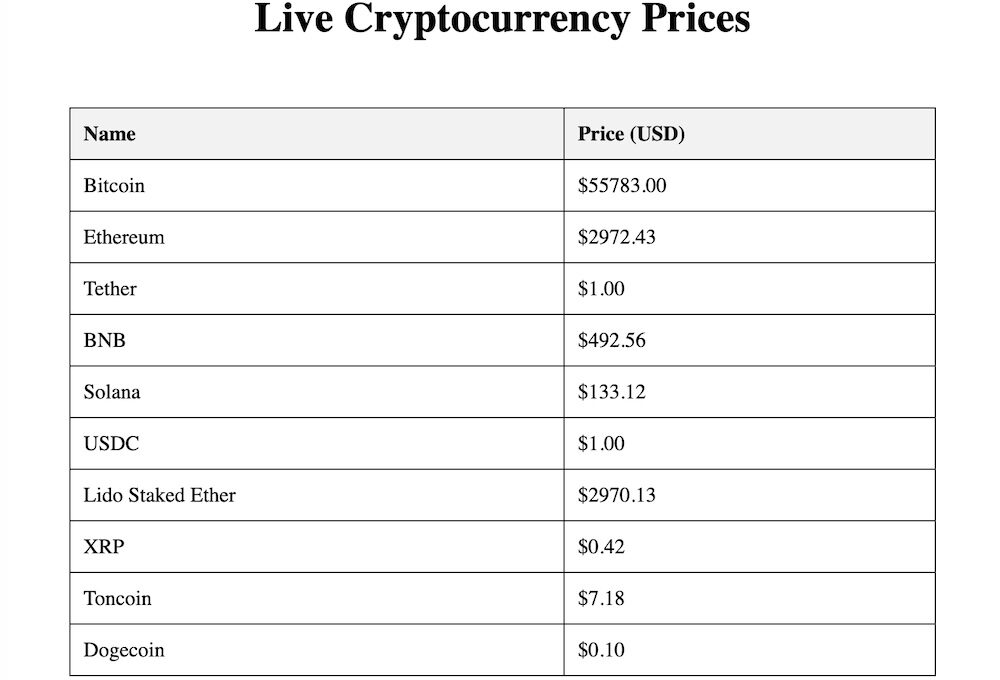
</html>If you use the above-given code, you will see the output that looks like the screenshot below.
This URL “https://api.coingecko.com/api/v3/coins/markets?vs_currency=usd&order=market_cap_desc&per_page=10&page=1&sparkline=false” in the code fetches the top 10 Cryptocurrency prices according to their market cap.
If you want to fetch prices for specific coins only, you can use the URL this way: “https://api.coingecko.com/api/v3/simple/price?ids=bitcoin,ethereum,binancecoin&vs_currencies=usd”. It will fetch prices for Bitcoin, Ethereum, and Binance Coin as mentioned in the URL separated by command. You can mention other currencies.
Limitations of Free APIs
Most free APIs come with rate limits. For example, the CoinGecko API has a rate limit of 50 calls per minute. If you need higher limits, you can opt for their pro plans, which offer more requests and additional features.
Method 2: Using Web Scraping
Pros:
- No rate limits
- Can scrape data from multiple sources
Cons:
- Risk of getting your IP blocked by the website if you are overdoing it
- Requires more maintenance and handling of website structure changes
Note: We will use coingecko.com in this example, but please understand that this is for tutorial purposes only. If you try to fetch frequently, your IPs/Domains are likely to get blocked by them.
We will use Python with Flask to implement it. It can also be achieved using JavsScript and HTML only, but it typically requires running in a browser environment since JavaScript doesn’t have built-in capabilities to fetch and parse HTML from remote websites in a server-like manner without the help of backend services. Python makes it easier to implement and process.
If you are running Apache
Step 1: Install Required Software
Install Python, pip, Apache, and the mod_wsgi module:
sudo apt update
sudo apt install python3 python3-pip apache2 libapache2-mod-wsgi-py3
Step 2: Install Flask and Other Dependencies
Create a project directory, navigate to it, and install the necessary Python packages:
cd /path/to/project_directory/
pip3 install flask requests beautifulsoup4
Step 3: Configure Apache
Create a new configuration file for your Flask app:
sudo nano /etc/apache2/sites-available/flaskapp.confAdd the following content, replacing /path/to/your/project with the actual path to your project:
<VirtualHost *:80>
    ServerName your_domain_or_IP

    WSGIDaemonProcess flaskapp python-path=/path/to/your/project
    WSGIScriptAlias / /path/to/your/project/app.wsgi

    <Directory /path/to/your/project>
        Require all granted
    </Directory>

    Alias /static /path/to/your/project/static
    <Directory /path/to/your/project/static>
        Require all granted
    </Directory>

    ErrorLog ${APACHE_LOG_DIR}/flaskapp_error.log
    CustomLog ${APACHE_LOG_DIR}/flaskapp_access.log combined
</VirtualHost>
Enable the new site and restart Apache:
sudo a2ensite flaskapp.conf
sudo systemctl restart apache2
Step 4: Create the WSGI File
Create a file named app.wsgi in your project directory:
nano /path/to/your/project/app.wsgiAdd the following content:
import sys
import logging
from pathlib import Path

# Add project directory to the sys.path
project_home = u'/path/to/your/project'
if project_home not in sys.path:
    sys.path = [project_home] + sys.path

# Set up logging
logging.basicConfig(stream=sys.stderr)

# Import Flask app
from app import app as application
Step 5: Create the Flask Application
Create a file named app.py in your project directory and add the provided code:
from flask import Flask, render_template
import requests
from bs4 import BeautifulSoup

app = Flask(__name__)

@app.route('/')
def home():
    url = 'https://www.coingecko.com/'
    headers = {
        'User-Agent': 'Mozilla/5.0 (Windows NT 10.0; Win64; x64) AppleWebKit/537.36 (KHTML, like Gecko) Chrome/58.0.3029.110 Safari/537.3'
    }

    response = requests.get(url, headers=headers)
    soup = BeautifulSoup(response.content, 'html.parser')

    # Find the table rows for cryptocurrencies
    table = soup.find('table', {'data-coin-table-target': 'table'})
    rows = table.find('tbody').find_all('tr')

    # Extract data for each cryptocurrency
    crypto_data = []
    for row in rows:
        name_tag = row.find('a', {'class': 'tw-flex tw-items-center tw-w-full'})
        price_tag = row.find('td', {'data-sort': True})

        if name_tag:
            name = name_tag.find('div', {'class': 'tw-text-gray-700 dark:tw-text-moon-100 tw-font-semibold tw-text-sm tw-leading-5'}).text.strip()
        else:
            name = "N/A"

        if price_tag:
            price = price_tag.find('span', {'data-coin-id': True}).text.strip()
        else:
            price = "N/A"

        crypto_data.append({'name': name, 'price': price})

    return render_template('index.html', crypto_data=crypto_data)

if __name__ == '__main__':
    app.run(debug=True)
Step 6: Create the HTML Template
Create a folder named templates within your project directory and create a file named index.html inside the templates folder with the provided content:
<!DOCTYPE html>
<html lang="en">
<head>
    <meta charset="UTF-8">
    <meta name="viewport" content="width=device-width, initial-scale=1.0">
    <title>Cryptocurrency Prices</title>
    <style>
        table {
            width: 80%;
            margin: 50px auto;
            border-collapse: collapse;
        }
        table, th, td {
            border: 1px solid black;
        }
        th, td {
            padding: 10px;
            text-align: left;
        }
        th {
            background-color: #f2f2f2;
        }
    </style>
</head>
<body>
    <h1 style="text-align: center;">Cryptocurrency Prices</h1>
    <table>
        <tr>
            <th>Name</th>
            <th>Price</th>
        </tr>
        {% for crypto in crypto_data %}
        <tr>
            <td>{{ crypto.name }}</td>
            <td>{{ crypto.price }}</td>
        </tr>
        {% endfor %}
    </table>
</body>
</html>
For Servers Running Ngnix
For Nginx, some steps overlap with Apache, but there are specific steps for Nginx setup.
Step 1: Install Required Software
Install Python, pip, Nginx, and Gunicorn:
sudo apt update
sudo apt install python3 python3-pip nginx
pip3 install gunicorn flask requests beautifulsoup4
Step 2: Install Flask and Other Dependencies (Repeated from Apache)
Create a project directory, navigate to it, and install the necessary Python packages:
cd /path/to/project_directory/
pip3 install flask requests beautifulsoup4
Step 3: Create the Flask Application (Repeated from Apache)
Create a file named app.py in your project directory and add the provided code:
from flask import Flask, render_template
import requests
from bs4 import BeautifulSoup

app = Flask(__name__)

@app.route('/')
def home():
    url = 'https://www.coingecko.com/'
    headers = {
        'User-Agent': 'Mozilla/5.0 (Windows NT 10.0; Win64; x64) AppleWebKit/537.36 (KHTML, like Gecko) Chrome/58.0.3029.110 Safari/537.3'
    }

    response = requests.get(url, headers=headers)
    soup = BeautifulSoup(response.content, 'html.parser')

    # Find the table rows for cryptocurrencies
    table = soup.find('table', {'data-coin-table-target': 'table'})
    rows = table.find('tbody').find_all('tr')

    # Extract data for each cryptocurrency
    crypto_data = []
    for row in rows:
        name_tag = row.find('a', {'class': 'tw-flex tw-items-center tw-w-full'})
        price_tag = row.find('td', {'data-sort': True})

        if name_tag:
            name = name_tag.find('div', {'class': 'tw-text-gray-700 dark:tw-text-moon-100 tw-font-semibold tw-text-sm tw-leading-5'}).text.strip()
        else:
            name = "N/A"

        if price_tag:
            price = price_tag.find('span', {'data-coin-id': True}).text.strip()
        else:
            price = "N/A"

        crypto_data.append({'name': name, 'price': price})

    return render_template('index.html', crypto_data=crypto_data)

if __name__ == '__main__':
    app.run(debug=True)
Step 4: Create the HTML Template (Repeated from Apache)
Create a folder named templates within your project directory and create a file named index.html inside the templates folder with the provided content:
<!DOCTYPE html>
<html lang="en">
<head>
    <meta charset="UTF-8">
    <meta name="viewport" content="width=device-width, initial-scale=1.0">
    <title>Cryptocurrency Prices</title>
    <style>
        table {
            width: 80%;
            margin: 50px auto;
            border-collapse: collapse;
        }
        table, th, td {
            border: 1px solid black;
        }
        th, td {
            padding: 10px;
            text-align: left;
        }
        th {
            background-color: #f2f2f2;
        }
    </style>
</head>
<body>
    <h1 style="text-align: center;">Cryptocurrency Prices</h1>
    <table>
        <tr>
            <th>Name</th>
            <th>Price</th>
        </tr>
        {% for crypto in crypto_data %}
        <tr>
            <td>{{ crypto.name }}</td>
            <td>{{ crypto.price }}</td>
        </tr>
        {% endfor %}
    </table>
</body>
</html>
Step 5: Configure Nginx
Create a new configuration file for your Flask app:
sudo nano /etc/nginx/sites-available/flaskappAdd the following content, replacing your_domain_or_IP and /path/to/your/project with the actual values:
server {
    listen 80;
    server_name your_domain_or_IP;

    location / {
        proxy_pass http://127.0.0.1:8000;
        proxy_set_header Host $host;
        proxy_set_header X-Real-IP $remote_addr;
        proxy_set_header X-Forwarded-For $proxy_add_x_forwarded_for;
        proxy_set_header X-Forwarded-Proto $scheme;
    }
}
Enable the new site and restart Nginx:
sudo ln -s /etc/nginx/sites-available/flaskapp /etc/nginx/sites-enabled
sudo systemctl restart nginx
Step 6: Run the Flask Application with Gunicorn
Navigate to your project directory and run the application with Gunicorn:
cd /path/to/project_directory/
gunicorn --bind 0.0.0.0:8000 app:app
Running the Application
- For Apache: Your Flask application should now be accessible via your domain or IP address configured in Apache.
- For Nginx: Your Flask application should now be accessible via your domain or IP address configured in Nginx.
Conclusion
In this guide, we explored displaying live cryptocurrency prices on your website using the CoinGecko API and web scraping. The CoinGecko API offers an easy, reliable solution without requiring an API key for basic use, but it comes with rate limits that can be lifted by opting for a paid subscription. On the other hand, web scraping provides potentially unlimited data access but carries the risk of being blocked if overused. For professional applications, it’s advisable to use a paid API subscription to ensure consistent and unrestricted access to cryptocurrency data.
Need Help in configuration? Contact me@zoheb.org for professional help.