How to change the country for your Apple ID, App Store or iTunes Store
There are a couple of methods to change the region for your Apple ID, but why someone will do that? There could be various reasons that a user may want to change the country for his/her Apple ID. Some of them are as follows;
- A user has moved to a different country for work or any other purpose
- You want to download Apps (ex: Spotify), but those are not available for your region
- You are a developer or blogger, and want the content based on a specific country
Earlier told a method to change the country, but that don’t work any more. Now you have only 2 ways to change the country for Apple ID;
- Add or Change Credit Card Detail for Apple ID that should belong to the country you want to switch to. It can be done with existing account
- Create a new Apple ID, and select the country of your choice. No payment information required
1. Changing Country Along with Payment Detail
This option is basically for those who have really moved to a different country, but there are still exceptions. Adding Payment information is temporary, and you can remove Credit Card Detail from Apple Account after changing the country. So a temporary working credit card will also do this job. There are some companies that provide Virtual Credit Card, and you can get in touch with them if they can provide a US based card (or the country you want). If they do, you are good to go, because they usually provide Master or Visa card that Apple accepts.
Once you have the Payment Information ready, follow these steps to change the country
Mac Users
- You can launch iTunes or App store on Mac
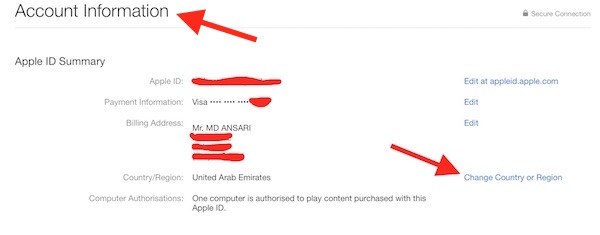
- If using iTunes click on your Name/Apple ID, and Select Account Info
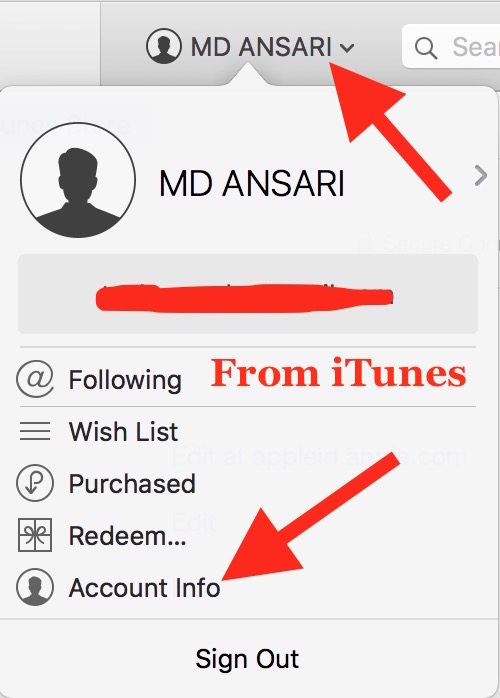
- If using App Store, click on Account

Rest of the steps are same for both
- Click on Change Country or Region under Account Information Section
- Select the country from drop down list, and click Change
- Now you may get a page where you need to click on continue, and then accept terms and conditions
- The last step is to provide the valid payment information along with a valid billing address and mobile number. Once you are done you can save it
Note : Changing the country without being their include some risks, like you may not receive sms/verification code via sms from Apple or for Keychain verification in future unless you actually own that mobile number.
iPhone, iPad or iPod Touch Users
- Launch iTunes Store or App Store
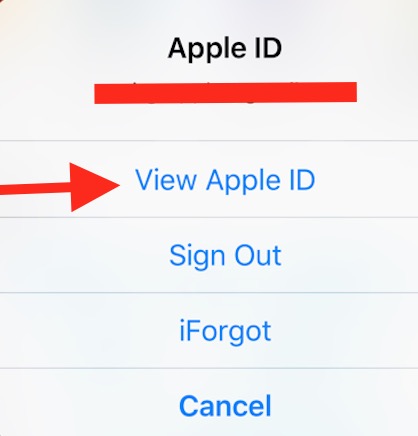
- Click on your Apple ID at the bottom, and hit View Apple ID, and then Enter Password to manage
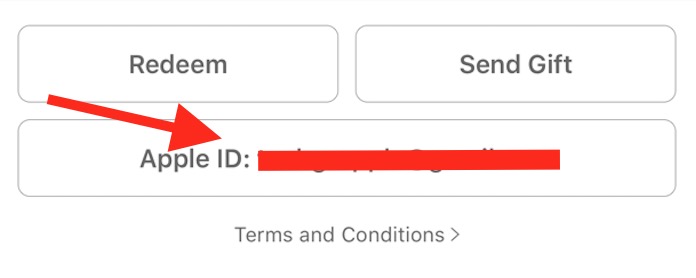
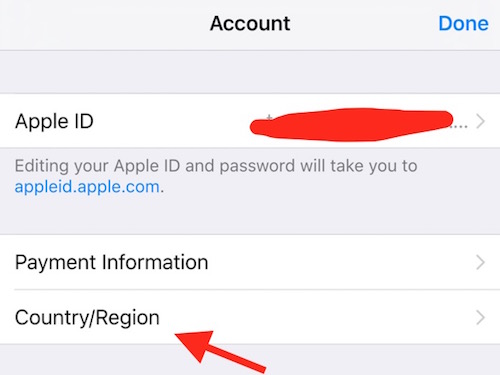
- Now Tap on Country/Region
- Select Change Country or Region
- Rest of the steps are same as on Mac. You need to select the Country you want to choose for your Apple ID, Enter the Payment information, billing address as in new country and save.
2. Create New Apple ID to change country without payment information
You can visit Apple ID creation page, and create a new ID filling the information there. Get the help of Fake ID Generator to find dummy phone number, address and PO Box. While Creating a new ID, you can choose the country of your choice without providing any Payment information. However, keep in mind that such accounts are not secure, and password retrieval, or iCloud verification may be tough or even impossible. It’s better to use such account for testing purpose only, and have a personal valid Apple ID.
