How to Dim a Picture on Mac
When you buy a new Mac it comes with preloaded iWork apps; Numbers, Keynote and Pages. You can easily work with those file you have created on MS office. Numbers works as Microsoft Excel, Pages do the job of Microsoft Word, and Keynote allows to make presentation slides like Powerpoint. So iWork app let users create MS Office compatible documents that can be used on Mac as well as Windows. Keynote is not an image editor app, but it can help you dim a picture on Mac.
How to dim a picture on Mac or Keynote app
- Launch Keynote application on Mac
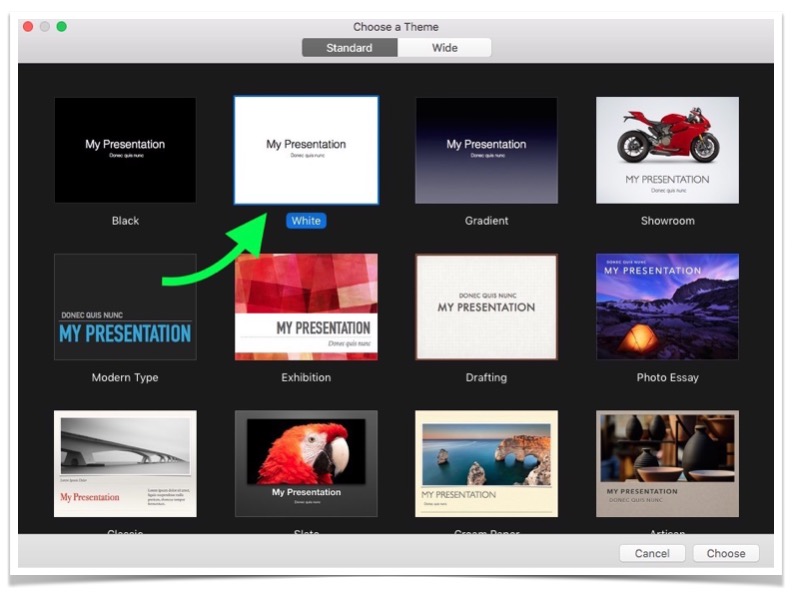
- Choose to create a New Presentation
- Select White Theme (because Keynote make it transparent, and it select any dark theme, the background of the theme may destroy your work unless you are doing it purposely)

- Now press Command+A key to select all, and then press Delete key to clear the page
- You have a black page now. Add an image by dragging and dropping it to Keynote app
- You can adjust image size according to your need
- On the left side, you will see Capacity option. If you don’t see it, make sure you are under Style tab, and click on image to select. Now decrease the capacity to dim the image
- If you want to write any text on image, click on the Text (T icon), and you can write
- The image what you see above is with 100% capacity, and the image below is with 15% capacity
How to save the image you edited on Keynote
Method 1 : If you want to save the whole page as image
- Click on File option (located in menu bar)
- Select Export, and then click Images option
- Now you can choose to save as JPEG, PNG, or TIFF
Method 2 : When you don’t want to save the whole page
- Press Command+Shit+4 to enable manual screenshot capture
- Now select the image area you want to capture
- That’s it, it will be saved under Desktop folder

