How do I Run .PHP Files or Web Pages offline or Without Online Server
If you are learning Web Development, then PHP is one of the programming that you need to learn to start creating dynamic pages. However, PHP files don’t run without any server like HTML or JavaScript do. You may be suggested by to get a hosting or put your files on the server to test PHP codes or webpages you have created. Well, that will surely cost you money and you should not do that as long as you are not ready to put your website online or you are just in the initial phase of learning. We have a free solution for you that won’t cost you a dime. Let’s learn about it.
What are the requirements to run PHP files offline without an online server
You will need to download and install XAMPP on your computer. We will provide the download link after sharing the system requirement.
You need a computer that runs one of the following operating system:
- Windows OS: Officially it says that XAMPP is available for Windows 32-bit version only. However, if you are running a 64-bit machine, that’s fine. You can still use it. Please note that it is not compatible with Windows XP and Windows Server 2013.
- OS X or macOS: 64-bit Mac OS X 10.6 or later model needed to install XAMPP.
- Linux: You need a 64-bit version of Linux installed. Almost all distribution types supported.
Download Link for XAMPP to Run PHP
Visit this link to download XAMPP for macOS / OS X, Windows, and Linux machines.
Note for Mac Users:
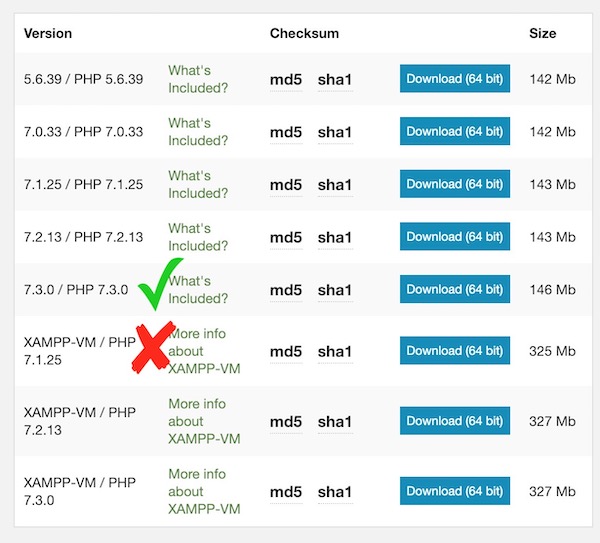
Please make sure that you are downloading the correct version and not the XAMPP-VM if you don’t know what you are really doing. See the screenshot below:
Install XAMPP On your Computer
After you have downloaded the file, install the application of your computer. You can install XAMPP on your system just like you install any other application. Mac users need to move the file to Application folder after extracting .dmg file that you download.
How to configure XAMPP to Run PHP file
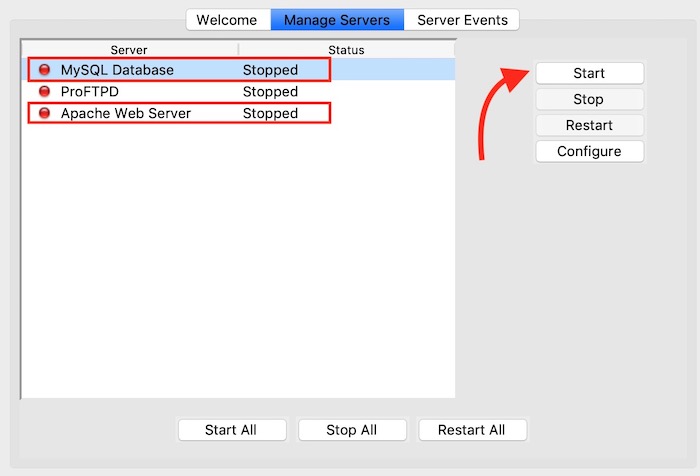
- Launch XAMPP application and select the Manage Servers Tab
- Select MySQL Database and Apache Web Server one-by-one and then hit the Start button.
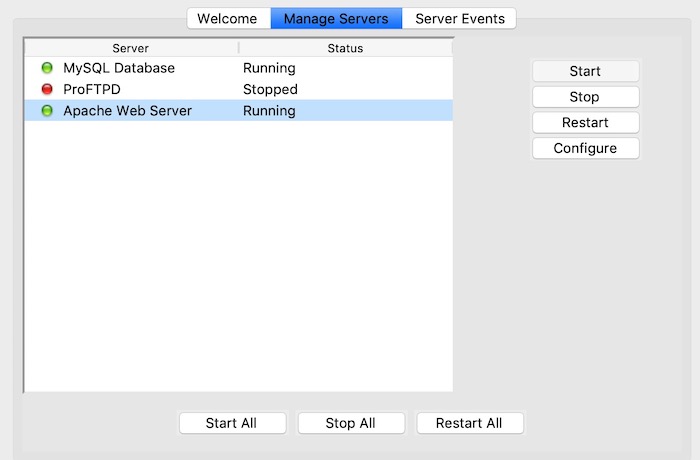
- Once started, they both will be highlighted in green color and should look like this:
- Note: You won’t need ProFTPD if your objective is to just Run and Test PHP files even you
have want to save outfile . You can simply create Folder on your computer and out those folder’s source as save location in your coding. - Now you can open a web browser and type localhost in
URL bar. The Localhost means that you are under XAMPP/xamppfiles /htdocs folder.
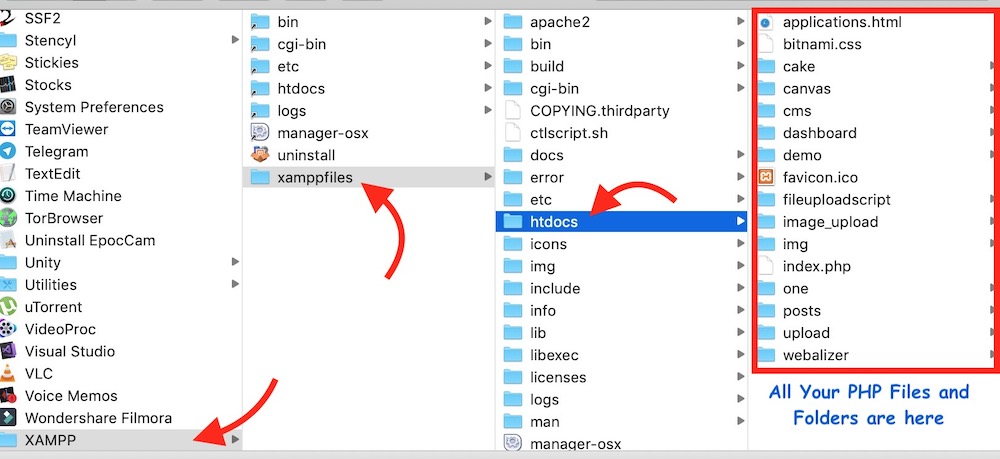
- For example: If I have created an example.php file saved under XAMPP/xamppfiles/htdocs/Posts folder, then I will type localhost/posts/example.php in the URL bar in any internet browser to open example.php webpage that I have created. You can create a shortcut on the Desktop or anywhere you like for easy access.
- You must create all your PHP related files and folder under the same location (XAMPP/xamppfiles/htdocs/) or those files may not be accessible via localhost in the browser.
- Important Note: Please do understand that if you have configured the port using the Configure option within PHP application, you will have to use port after localhost with
colon . The default port is usually 80. So if you type localhost:80 instead oflocal host host in the browser, it’s the same.
How to Configure FTP with XAMPP
After you have installed XAMPP on your machine, follow these instruction to view the FTP tutorial or documentation:
- Type localhost in the browser or localhost followed by the port if you have configured that way.
- Click on How-To Guides option.
- Finally hit the Configure FTP Access option to see the set-up guide. It will provide the instruction depending on what OS you are using.
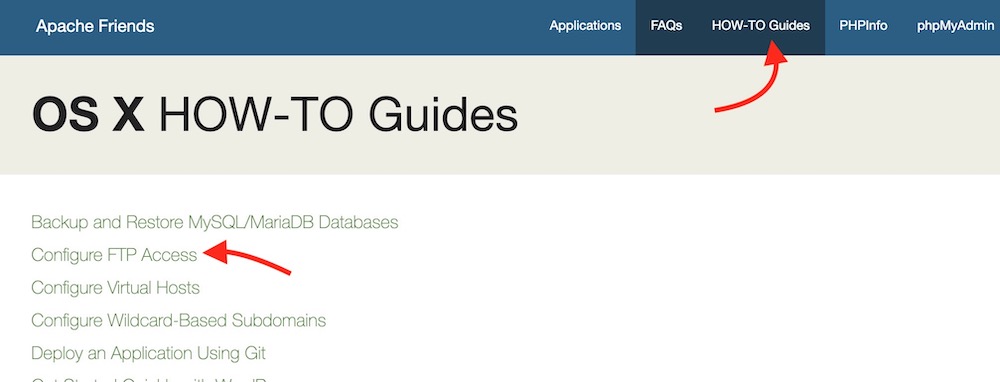
- Don’t forget to start the ProFTPD option opening XAMPP application, else it won’t work.
How to access phpMyAdmin page to create mySQL database and manage them
Just open the web browser and type the following in the URL bar and hit Enter:
How to fix “XAMPP is not uploading images or sending images or files to the folder I have created?”
It’s a common issue that many people face. I encountered first when I created a file upload script and after all effort and correct code the file was not uploading. I was quite surprised when I tested it on online server and it worked. You will have to change folder permission to fix this issue. You can set the read and write permission to everyone if you are using a personal computer as those folders are limited to your system. (never do this for online server or hosting account).
Changing Folder Permission to fix issue: Right Click on the folder and select Get Info or Properties option depending on what system you are using. Mac users usually have this option at the bottom of Get Info window and the Windows users can access this option going to the Security tab and Advanced option.