How to change Computer Name, Account Name and Full Name in OS X
Computer Name, Account Name and Full Name is set when you run OS X setup first time or reinstall OS X after formatting the storage, but it can be changed anytime you want.
Computer Name
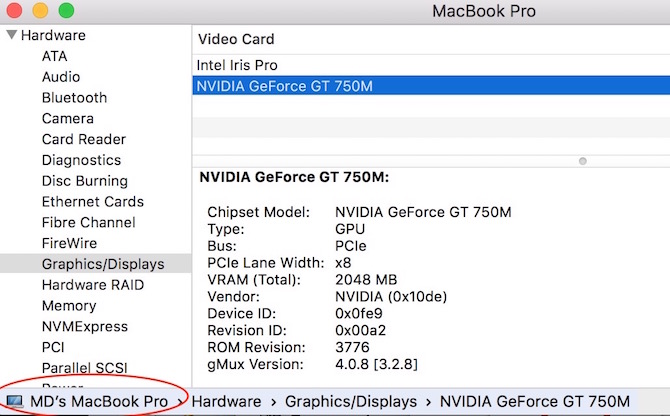
 It is displayed at many places. For example : If you open About this Mac and click on System Report, it shows the computer name at the bottom on that window. If you have setup Sharing Option, or connecting to your MacBook / iMac via another device, you can see computer name. Have a look at the screenshot
How to change computer Name in Mac / OS X
Earlier we could change Computer Name from Sharing Option (located in System Preferences), but I checked in OS X El Capitan, and it didn’t work that way. So it can be changed from Terminal.
Follow these steps to change the Computer Name
- Launch Terminal
- Type following code
sudo scutil –set ComputerName “DesiredNameHere”
- Please note that Desired name, must have quote (“). For example: If I want to change computer name from MD’s MacBook Pro to Zoheb’s MacBook Pro, I would type this command in MacBook; sudo scutil –set ComputerName “Zoheb’s MacBook Pro”
- You will be asked to put Admin Password. So Enter the password and press Enter key.
- You will not get any confirmation, but it’s changed. You can check It also shows up Under Preferences –> Sharing
How to Change Account Name (Admin Name) and Full Name in MacBook / iMac / OS X
- Go to System Preferences –> Users and Groups
- Click on lock icon and enter your Admin password to unlock feature
- Now right-click / secondary click on Admin Name
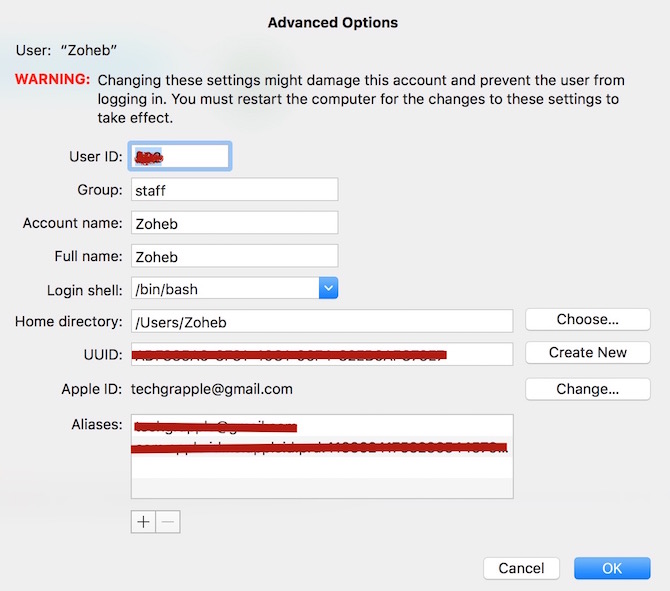
- Click on Advanced Options
- Now you can edit your Full Name and Account Name here. Changing Account Name also changed the Admin Name
- After making all the changes, you can save
How to Delete Existing Admin and Add New Admin
Doing this removes all the existing files as well as those apps that have been installed by existing Admin. If you want to do this, please read our article; How to Format Mac quickly without OS X Reinstallation.
Get More OS X Tips
