How to record your iPhone, iPad or iPod Touch Screen with or without audio on Mac OS X
As we already know OS X and iOS both have been designed to communicate with each other in an effective way. If you want to record your iPhone or iPad Screen, you don’t need any additional or third party software to do that. This can be done easily if you have a MacBook or iMac. You can record iPhone’s screen along with audio. If you are playing a video or game on iPhone, and want your Mac to record the video/gameplay with audio, you can do it easily.
How to record iPhone, iPad or iPod Touch Screen with or without audio on Mac OS X
- Connect your iPhone/iPad to Mac via cable
- Launch QuickTime Player on Mac
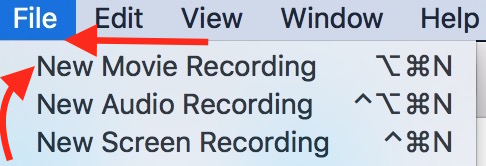
- Click on File (by default located at the top left corner in Menu Bar)
- Click on New Movie Recording
- Shortcut : Or after opening QuickTime Player, You can simply use Shortcut Key (Option+Command+N)

- Now you will see your face on Mac’s Screen because QuickTime uses Mac’s Facetime HD camera by default. You need to make little changes
- Click on the arrow sign (located beside recording button). Check screenshot below

- Select your iPhone Under Camera Option
- Select Your iPhone under Microphone option (Note : If you don’t want the audio from iPhone, Select Internal Mic. Or if you want to record a completely silent video use this Android Screen Recorder for Mac that can also record iPhone’s Screen)
- Click on Red Button (recording button) to start recording iPhone Screen
- Now whatever you do on your iPhone it will be recorded. Whether you are playing a Video on YouTube or Game on your device, the recorded sound will be loud and clear. Even the sound of typing/tapping will be recorded
- While the Screen is being recorded, you can see the video duration as well as video size

- Once you are done with the recroding, press the stop button. Now you will get the output that you can Play
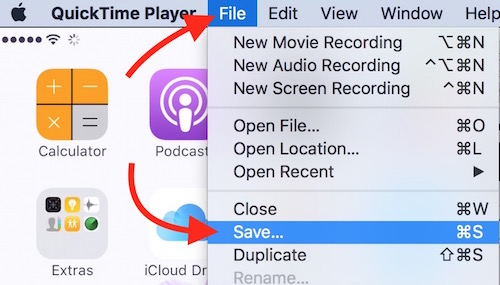
- The video is recorded, but not saved. Click on File, and hit Save option. Name the video file, select desired location/folder to save. That’s it, and you are done

- The recorded video will be saved in MOV format. If you want to change the format, please read our article how you can convert MOV to MP4 or M4V on Mac OS X
Here is a sample screen recording video that was recorded following the above-mentioned method. You can watch screen activity, and can also listen to the sound of YouTube Video Play in this screen recording video.

October 11, 2016 @ 4:38 am
Nice guide, thanks for the sharing. For iPhone users who using PC, I’d recommend acethinker iphone screen recorder. I always use it to make screen recordings of my apps, worked pretty well. The app uses AirPlay and has a built in recorder that captures picture and sound.