How to set password for documents and ZIP files on Mac OS X without additional app
Making a ZIP file on MacBook or iMac is very easy; Just put the multiple files in one folder, right-click on the folder, and click Compress. However, that ZIP file can be opened by anyone. Today we will know how to set the password to protect a ZIP file and documents on Mac OS X without any additional app. You can share such files even on the internet, but only those can open who know the password.
How to set password to Protect a ZIP file on Mac OS X using terminal
For Zipping a folder with password
zip -er [archive] [folder]
For Zipping a file with password
zip -e [archive] [file]
For example: If you are zipping a folder (folder name : Smartphones) from Documents folder, and want the output on Desktop as Archive.zip. You would type this command
zip -er ~/Desktop/Archive.zip/ ~/Documents/Smartphones/
Once you Press Enter, it will ask for the password and then ask to confirm (password won’t show in the terminal when you type), now press Enter again, and it should be done if you have not made any error.
However, when you open the zip file with password, target folder would be located like; Users –> UserName –> Desktop –> TargetFolder
So this is not what you want, do you? Just the target folder should be zipped, not the folders under empty folders. In this case, you need to create password protected ZIP File under the same path where your source file is. For example, MyDocument folder is located under Documents folder, then create the ZIP file under Documents folder as well.
Here is the solution
- Launch terminal (From Application –> Utility
- Go to the folder where your target file is. By default, you should be on Home Folder. It looks like this in my case Zoheb:~ Zoheb$
- type cd FolderName (FolderName is the name of the folder/location where you have put the folder that you want to zip). It could be; cd Desktop OR cd Documents Or cd Movies, and so on…
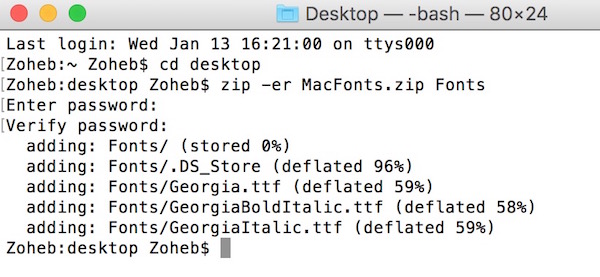
- Once you are there, type command to zip a folder with password; zip -er DesiredFileName.zip FolderName
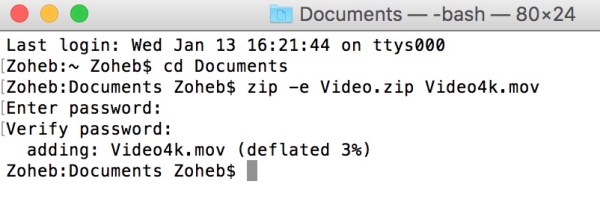
- Use this command in case of File; zip -e DesiredFileName.zip FileName
Screenshot of Zipping a Folder with password
Screenshot of Zipping a File with Password
If you still face any issue, please comment below, and you would get a reply as soon as we can.
Setting Password for documents, like Pages, Keynote
You don’t need to zip your documents or write any command via terminal if you want to set a password for a specific document only. If you are preparing a document or have already prepared, follow these steps;
- Make sure your document is open
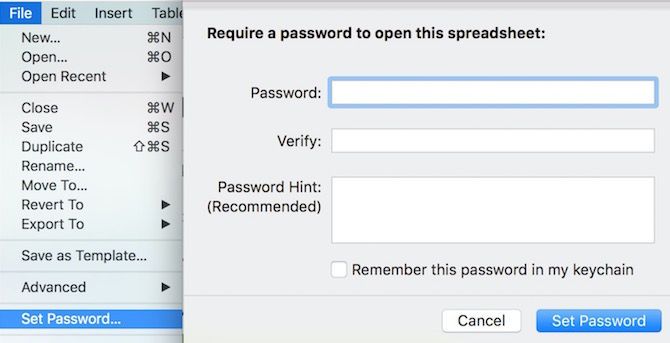
- Click on File
- Click on Set Password
- You will get another window where you need to put the desired password, and confirm it. You can set password hint as well if you want. If you want KeyChain to store this password, check the box as well
- Click on Set password, and you are done
Update: You can also Password Protect Folders and Files on Mac
MacPaw’s Hider 2: The Best Alternative With Enhanced Features
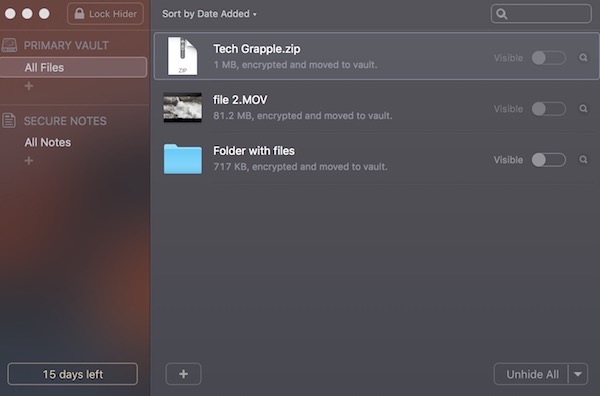
Hider 2 Application from MacPaw is the best alternative to protect files, folders, media, notes etc. Here are some very useful features of Hider 2 Application.
- It protects all type of files, videos, music, documents, folders, zip etc. You can even hide folders without zipping them.
- You can make password protected Notes and keep all the information secure
- It also supports external storage
- Hider 2 Protects Files and Notes with AES-256 Encryption and Password
How to use Hider 2 Application to Protect Files, Folders, and Notes
- Download Hider Application from MacPaw
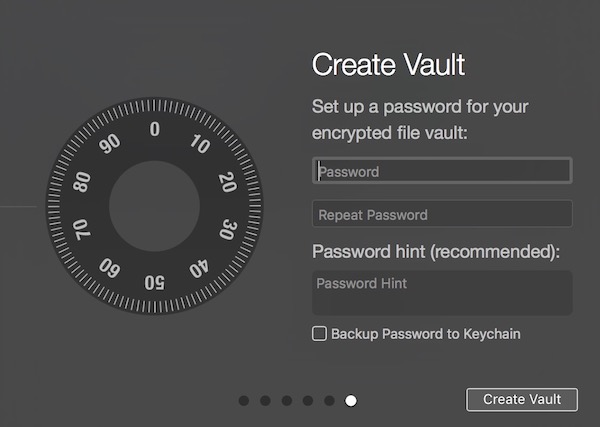
- Launch the app and type a password to protect files
- Click on Create Vault option and choose a destination folder where you want to keep the shortcut of the Hider 2 app
- Now you can drag and drop any type of files to the Hider App and make sure visible option is disabled. It will hide the files now, and they can be accessed via Hider 2 app only. However, no one can access without entering the password
- If you want to create a secured password protected note, you can simply click on All Notes option and then hit the + sign to create a note
Get more OS X tips
